04 Jul
Best-4-Gaming-PC-Build

The Best 4 Gaming PCs to Build Under $1000

Introduction

Building a custom PC allows you to tailor the components to your needs instead of buying a prebuilt system.

It is also more cost-effective, as you can save hundreds of dollars by buying and assembling the core components yourself.

With a budget of less than $1,000, you can build a gaming PC that can handle various games and supports high resolution.

Now, let’s review the essential components, the build process, and the four best gaming PCs under $1000.

What parts do you need to build a gaming PC for under $1000?

Here are the core components you need to assemble a gaming PC for less than $1000.

  • Central Processing Unit CPU: Sometimes called processor, the CPU handles all of the processes and ensures strong performance for your games. The big names here are Intel and AMD.
  • Graphics Processing Unit (GPU): The GPU displays graphical images on your PC. If your gameplay has complex graphics, you’ll need a powerful graphics card to display it accurately. The major brands in this department are Nvidia and AMD.
  • Motherboard: You install and connect all the core components on the motherboard so they work together and function properly.
  • Storage (SSD): An SSD provides your PC with storage space, fast load times, and smooth performance. Consider using an SSD and a well-maintained hard drive as secondary storage for rarely used files.
  • RAM: The RAM temporarily stores data and information processed by the CPU. Your PC will perform faster with more RAM (combined with a quality processor).
  • Power Supply Unit (PSU): PSU supplies power to the entire PC build, allowing for easier cable management within the gaming setup.
  • Case: This enclosure holds the parts in your build. It will dictate the PC’s looks, size, shape, and identity.
  • Cooler: The cooling system protects the CPU from overheating. Most CPUs have this built-in, so you might not need an external one.
  • OS: OS stands for operating system. Windows is the recommended OS for your gaming PC, though some gamers prefer Linux.

How to build your $1000 gaming PC; step-by-step

Before building your computer from scratch, you must gather some tools and prepare your workspace.

Get all the core components you’ll need to assemble the build. These include a CPU, motherboard, power supply unit (PSU), graphics card, RAM, storage (SSD), and case.

gaming-computer-parts

Source: Salvador Ramírez

There are almost infinite options for each of these parts. But before deciding, you must factor in a $1,000 cap in budget, performance, manufacturer preferences, and aesthetics.

The most important tool you need is a screwdriver for installing components into your case. A Phillips screwdriver will do just about everything. You’ll require a flashlight or extra light source to illuminate when installing cables and bending over the chassis.

Other tools you’ll need include a tube of thermal paste, a USB flash drive to store the OS installer, zip ties to tie cables inside your PC, and scissors for unpacking components.

Ready to build your dream gaming PC for a budget of $1000?

Here’s a step-by-step guide to assemble your system.

Step #1: Install CPU on the Motherboard

Remove the motherboard from its packaging, place it on your work surface, and search for the CPU socket.

After finding the socket, remove the CPU from its packaging and align the arrow on the CPU with the arrow on the motherboard’s CPU socket. Gently seat the CPU onto the motherboard socket.

Be extra careful when handling the CPU, and avoid touching the pins to prevent damage.

Step 2: Install CPU Cooler on Motherboard

The next step is to install the CPU cooler. Since there are different types, I recommend consulting the manual for specific installation instructions.

If your motherboard already has a mounting bracket, place the cooler on it. Otherwise, remove this bracket if your CPU cooler doesn’t need one, or replace it if it uses a different bracket.

Also, if your cooler doesn’t have thermal paste pre-applied, you should manually apply some before placing it on the motherboard.

Step 3: Install RAM

Check your motherboard to see how many RAM slots it has (usually two or four).

Depending on the number of RAM you have, fill the available slots by simply snapping the RAM into place.

Step 4: Mount the Power Supply Unit (PSU)

Take the PSU out of its packaging and set its cables aside.

Look at your case and notice how the PSU is supposed to sit in it. Typically, you should place the PSU so its fan faces outside the case and receives decent airflow when needed. Also, ensure it has enough clearance.

Mount the PSU to the case using its screws and run the attached cables through the case to where they’ll need to be.

Step 5: Install Motherboard

If your motherboard has an unattached I/O shield, place it in the back of your case and make sure it’s seated correctly.

Once the shield is in place, install the motherboard on the case. Ensure all cables are threaded through to the right place, and align the motherboard with the I/O shield.

Then, mount the screws in all available screw holes to hold the motherboard in place. Connect the power supply to the motherboard.

Step 6: Install GPU

First, find the PCIe graphics card slot on your motherboard. Check the user manual to find the right slot if there are multiple PCIe slots.

Remove the GPU from its packaging, align it carefully with the slot, and gently push it until you hear a click.

Once the GPU is installed, screw it to the back of the case to make sure it’s secured. And if it needs auxiliary power connectors, connect it to the PSU.

Step 7: Install Storage

First, check your case to find the drive bays. Open the bay’s lever, pull out the tray, and place your drive.

After placing the drive, slide the tray back until it clicks into place. Once the storage drives are in place, connect them to the PSU and the motherboard using a SATA cable.

Step 8: Install Operating System

Once you’ve assembled all the parts, the final step is installing your operating system on the PC. Before starting the build, you should have prepared your OS on a USB flash drive.

Connect the USB flash drive to your PC and turn it on. Ensure that your components are all installed by checking the PC’s system info to be sure the system recognizes all parts.

Restart your computer so the PC boots from the USB drive and the OS installer shows up. Follow the on-screen instructions to complete the installation.

Now, that’s how you build a gaming PC.

You can always customize your build to meet different needs and update it with the latest hardware.

4 Best Gaming PC Builds under $1000

Building a powerful gaming PC setup for under $1,000 can be challenging.

Here are four best gaming PC builds that maximize performance without breaking the bank.

Build 1

MSI-MAG-Forge-112R-Case-Gaming-PC-Case

Source: Newegg

Component Type Model Price (USD)
CPU Intel Core i5-14400F $196
Motherboard MSI B760 Gaming Plus WiFi $148
RAM Corsair VENGEANCE RGB DDR5 6400MHz 32GB $110
GPU ASUS Dual GeForce RTX™ 4060 OC Edition 8GB $299
Storage Kingston Fury Renegade 500GB PCIe Gen 4.0 NVMe $79
PSU Thermaltake Toughpower GF A3 750W $90
Case MSI MAG Forge 112R Case $70
Total $992

This gaming PC delivers high performance on a budget.

It comes with 10-core Intel Core i5, Nvidia GeForce RTX and a MSI B760 motherboard that features built-in Wi-Fi and memory overclocking.

The PC build also has a 500GB fast SSD, 32GB high speed RAM and pre-overclocked ASUS RTX 4060 for gaming. In addition, it’s exterior case and PSU supports future upgrades and provides a great value for gamers.

Build 2

Zalman-T7-ATX-Mid-Tower-Gaming-Build

Source: Newegg

Component Type Model Price (USD)
CPU AMD Ryzen 5 7600 $189
Motherboard MSI B650 Gaming Plus WiFi $149
RAM G.Skill Flare X5 Series (AMD Expo) 6000MHz 32GB $104
GPU GIGABYTE Radeon RX 7700 XT GAMING OC 12G $399
Storage Kingston NV2 1TB M.2 2280 NVMe Internal SSD $60
PSU Thermaltake SMART 600W ATX $40
Case Zalman T7 ATX Mid Tower $50
Total $991

This build comes with the hexacore AMD Ryzen 5 7600, MSI gaming motherboard and 32GB of RAM. These parts combine to offer future-proof performance for gamers.

The RX GPU performs great for under $400. While the 600W Smart PSU powers the setup and the mid-range 1TB SSD is enough for storage.

With under $1000, you can get this build and enjoy top gaming performance, efficiency and future upgrade potential without breaking the bank.

Build 3

GAMDIAS-ATX-Mid-Tower-PC-Case

Source: Amazon

Component Type Model Price (USD)
CPU Intel Core i3-14100F $110
Motherboard Gigabyte B760M DS3H AX $140
RAM G.SKILL Ripjaws S5 Series $100
GPU ASUS Dual RTX 4070 SUPER OC 12G $599
Storage Silicon Power 1TB NVMe M.2 PCIe 2280 SSD $65
PSU XPG Core Reactor 750W $70
Case GAMDIAS ATX Mid Tower $54
Total $1138

With an entry-level Corei3 CPU, this build is more focused on higher res gaming and not so much on processing power. It has a powerful Nvidia RTX GPU which is great value and perfect for 2K/1440P gaming.

A compromise in this build is using an entry level Gigabyte motherboard and entry level Silicon Power storage to save costs. But it has high end RAM, top tier 750W gold rated PSU and super GPU. So, with this build, you have a clear upgrade path to extend its limits in the future.

Build 4

Phanteks-XT-Pro-Best-Gaming-PC-Builds

Source: Newegg

Component Type Model Price (USD)
CPU AMD Ryzen 7 5700X3d $160
Motherboard Gigabyte B550 UD AC $109
RAM Crucial RAM 32GB Kit (2x16GB) DDR4 3200 $61
GPU ASUS Dual GeForce RT 4060 Ti OC Edition 8GB GDDR6 $369
Storage WD Blue SN580 (2TB) Western Digital 2TB WD Blue SN580 NVMe Internal Solid State Drive SSD $119
PSU Corsair CX750M ATX 750W $74
Case Phanteks XT Pro $59
Total $951

The Nvidia RTX GPU makes this build excellent for 1080p and 1440p gaming.

It’s 8-core, 16-thread AMD processor combines with the Wi-Fi supported motherboard to ensure smooth gameplay. While the Phanteks case comes with a quality mesh design and contains enough space for all parts.

Factors to consider when building a $1000 gaming PC

When assembling a gaming PC with a budget of $1000, you need comprehensive planning to make your investment work.

The most important things to consider when upgrading or customizing a gaming computer include performance, upgradability etc.

Budget

Allocate funds for essential gaming PC components first and purchase features like RGB lighting later on.

Ensure you draft a strict budget and plan your purchases accordingly to get the best value for your money.

Upgradability

When building your gaming PC, future upgrades are key.

So choose components that can be upgraded without having to replace the whole build. This will extend the life of your system and keep your PC powerful for years to come.

Performance

Having powerful gaming performance under $1000 will require research and careful part selection.

So compare parts to find what you need within your budget.

Aesthetics

Do you have a certain look in mind? Then you need to consider aesthetics when building your $1000 gaming PC.

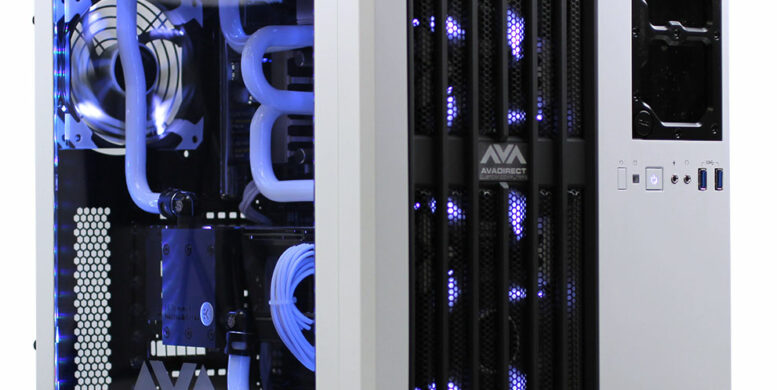
Whether it’s a dark, all white or RGB PC setup, decide on your theme for the computer. But remember, chasing an awesome look will add to the overall cost of the build.

22 Jun
at&t-logo

AT&T Data Leaks: What You Should Know

Data breaches have become an alarming concern for individuals and businesses alike.

Among the notable incidents, the AT&T data leak stands out due to its impact on millions of customers. First surfacing in 2021, the leaked database exposed personal information and revealed vulnerabilities in the company’s data security practices.

Whether you’re a current customer or former account holder, this article details the AT&T data breach, the personal information compromised, and steps you can take to protect yourself.

All you need to know about the AT&T Data Leaks

The AT&T data spill can be traced back to 2021.

A well-known hacker named Shiny Hunters claimed to have stolen customer data from the company. The hacker posted a sample of the database for sale on a cybercrime forum at a starting price of $200,000.

at&t-data-leaks-shiny-hunters-post-on-cybercrime-forum

Source: BleedingComputer

The shared sample proved that the database contains valid personal information belonging to AT&T customers, as confirmed by an anonymous security researcher. However, the hacker didn’t reveal any details about how the database was acquired.

BleepingComputer, an information security and technology publication, contacted AT&T to confirm the hacker’s claims. However, the company denied the breach and said the data was not from their systems.

Fast forward to March 2024, another threat actor named MajorNelson posted the same database for sale on an online cybercrime forum.

Again, AT&T firmly denied any compromise of their systems. The company found no evidence of a data breach and did not say whether or not the data could have possibly originated from a third-party vendor.

On March 30th, 2024, AT&T mass-reset customer passcodes after a security researcher discovered that the encrypted passcodes in the leaked data could be easily deciphered.

The US telco giant then launched a robust investigation and released a public statement confirming the data leak on the dark web, which affected over 70M customer records. This statement comes three years after Shiny Hunters initially uploaded the stolen data for sale.

at&t-data-breach-public-statement

Source: AT&T

Of the 76 million account holders affected, 7.6 million were current customers, while 65.4 million were former customers.

The acquisition source of the leak, whether from AT&T itself or one of its third-party service providers, remains unknown.

This situation has led many businesses to reconsider their data protection strategies. For those in the Milwaukee area, working with a Wauwatosa Marketing Company can be a great way to enhance your digital security and marketing efforts simultaneously.

What personal information was stolen?

The initial stolen database contained customers’ personal information such as full name, email address, date of birth, mailing address, phone number, social security number (SSN), and AT&T account number.

In addition, the recent dataset leaked in 2024 contained decrypted account passcodes, according to TechCrunch. These passcodes are four-digit numerical PINs used to grant secure access to AT&T customer accounts, whether online or in retail stores.

No financial or call history information was stolen.

How to check if your data was breached

If you were among those compromised, AT&T should have contacted you about the security breach.

According to its public statement, the company said it would communicate the situation via email or letter to the 76 million current and former customers affected. The email would contain details explaining the incident, what information was compromised, and its response to the leak.

You can also use the Have I Been Pwned website or Malwarebytes’s Digital Footprint Portal to check if your data is exposed in the AT&T leak.

If you manage your personal information and passwords in a Google account, the Password Checkup tool can alert you if your account information has been exposed. A password manager like Bitwarden can also help you check for stolen passwords online.

What are the top 2024 Data Leaks?

Over 20 major security breaches have occurred in 2024, and here are some of them.

Trello Data Breach – January 2024

This leak occurred in January 2024 and exposed personal information from over 15 million users of the project management platform. The compromised data includes email addresses, names, and usernames.

Bank of America Data Breach – February 2024

This breach occurred due to ransomware attacks targeted at one of the bank’s service providers. Over 57,000 customers were impacted by this attack. The compromised dataset includes name, address, social security number (SSN), birth date, and banking information.

Fujistu Data Breach – March 2024

Multinational IT company Fujistu also suffered a cyber-attack after malware was discovered on some work computers. Files containing customer information were stolen in the data breach.

Roku Data Breach – May 2024

The streaming provider suffered a data breach that affected about 576,000 customers and exposed their personal information.

Dell Data Breach – May 2024

In May, hackers attacked Dell’s customer portal and stole customer information. Data compromised from the breach included customers’ home addresses and order information. Around 49 million customers were affected.

How often should I reset my password?

When you suffer a data breach, the best line of defense is a password change.

But how frequently do you set a new password to ensure hackers have a hard time gaining access to your account?

Most cybersecurity experts recommend you reset your password every three months. However, there are some situations when you might have to change your password immediately.

Common situations where you’ll want to act fast and change your password immediately include whenever:

  • Someone hacked or gained unauthorized access to your account
  • Your online service suffers a data breach
  • You use an insecure network such as a public Wi-Fi
  • Your antivirus or computer maintenance tool detects malware on your computer
  • You no longer share an account with a third party

What are the best practices to secure your online safety?

Using the internet exposes you to several potential threats that can harm your data or devices.

Here are some internet safety best practices to follow to prevent the danger of a cyber attack or data breach.

Secure, trusted internet connection

Avoid using public Wi-Fi when you’re out in a public space. You have no direct control of the network’s security and can be at risk of cyber attacks. But if you have no other choice, ensure you use a virtual private network (VPN) before connecting.

at&t-data-leaks-safety-tips

Source: Glenn Carstens-Peters

Antivirus

Another internet safety practice is using a quality antivirus to clean and maintain your computer routinely. The security software will protect your device from common cyber threats.

Multi-factor authentication

Multi-factor authentication (MFA) allows your online services to ask for two or more verification methods before providing access. Enabling it will keep you safe online and reduce the risk of a cyber attack.

Strong passwords

When creating a password, ensure it is strong enough for hackers to access your accounts. The password should be hard to guess, used for only one account, and should contain at least 12 characters with one uppercase, one lowercase, one number, and a unique character.

Suspicious links

Links from untrusted sources, spam emails, or ads can infect your device with malware and compromise your data. So be careful and avoid clicking links from online sources you’re unsure of.

16 May
disc-cleanup-guide

What is Disc Cleanup on Windows & How to Do It

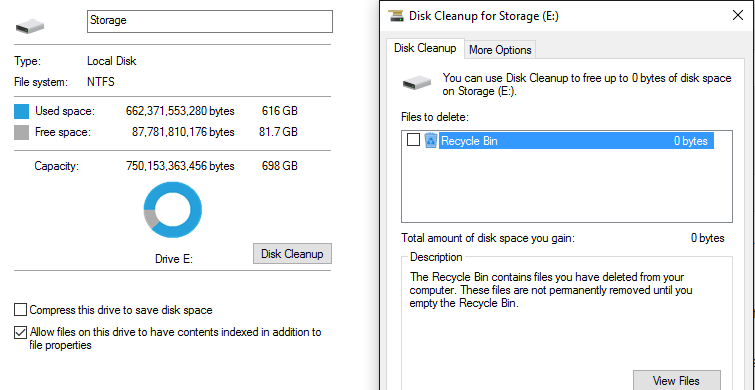
Some users confuse disc cleanup with disc defragmentation. While disc defragmenting involves analyzing and finding portions of files and combining them or deleting them, disc cleanup is all about freeing up space on your hard drive.

Think of it like looking at your refrigerator; you have a meat drawer, a veggie drawer, and maybe even a dairy drawer. If the main section of your fridge was running low on space, defragmenting it would be taking all of the similar food portions and putting them in the separate draws to make your refrigerator more efficient. Disc cleanup, on the other hand, would be physically purging the old food (see: files) and tossing them out. The food you don’t use anymore, things that are past their prime, and other unnecessary things, freeing up a ton more space than what you thought you had.
(more…)